Sunday, September 2, 2012

Making the Most of Your Harvest: Chicken

Saturday as I was packaging chicken for the freezer, I came upon the necks, butts, and wishbones.  I did not want to freeze them.  I knew we would not eat them, but I didn't want them to go to waste.  Whats a girl to do?  I made chicken stock.  The recipe is super easy.

Assorted Chicken Pieces
3 Stocks Celery
2 Small Onions
5 Baby Carrots
5 Cloves of Garlic
Fresh Basil
Fresh Sage
Fresh Thyme
Water

I started by tying up my herbs in cheese cloth, so I would have a easier time making sure my broth was clear.  I then added everything to my crock pot and letting its simmer for over 24 hours, on low.

9:00 Saturday Morning


9:00 Saturday Night


1:40 Sunday Afternoon


Straining out the junk

This is what would have been in my broth.
After I let it simmer on low for 24 hours I strain the broth.  All of my cheese cloth was dirty so I used a clean washcloth.  I will bag this up and freeze it.  If you wish to can this head over to The Welcoming House.  Heather is amazing, and a canning genius.  She just finished doing a canning spotlight on meat.  I on the other hand have never used my pressure canner. 

Friday, August 31, 2012

Chicken Butchering

Warning!

This post is about butchering chickens.  If you do not agree with eating animals or the killing of animals do not read.  If you can not stand to see a animal killed do not read.  I will delete any posts calling me and those that were here murderers.  I believe in the freedom of speech, but you have been warned.  Back to our regular scheduled post.


Chicken Butchering ♫

I feel a deep need to get back to the "old ways".  That includes having a garden and raising chickens.  It is an amazing way to beef up your food storage I just saved $30 off of my food bill by butchering these chickens, plus I dont' have to buy feed for them.  I like to hatch out my chickens here at home, its just more fun.  It is also a great for teaching my son about work, life, and loving animals.  On the other hand I don't need more then 4 rooster right now.  What to do with the rest, I know there are some that will say "Give them away so they can be pets.....".  I don't believe that chickens are pets, they are livestock.  I do have my favorites, but I believe that they were put on Earth to be eaten.  So today we butchered 21 chickens between 3 families.  Now that is not enough for even one family for a year, but it is a start. 
 
 
The first rule of butchering for beginners is to find an expert, someone who has butchered thousands of chickens.  That's where I began.  Next is to set up a time and day to do the butchering.  On your butcher day find all of your big pots and have them filled to the top with water and boiling. 
 
 
Then select the chicken that will be feeding your family, and kill it.  We chopped off their heads. 
 Next you scald them in the boiling water


Then you pluck, pluck, and pluck.  It seems like you will never get to the end of plucking the feathers.  I promise you will.


Beautiful, looks like they are from the store don't they?
Now they get a bath where the rest of the pin feathers are pulled out and all of the dirt comes off.

 Then it is time to start gutting.  This is where the picts stop and you will need to find an expert.  There is so much that you can do different while gutting a chicken.


Juli and Sheryl try their hand at gutting a chicken while Sharon gives instructions. 
Now its my turn except we are cutting them into fryers.

This guys is about   to loose his wing.


 Not really a tutorial I know, but it was an amazing experience for everyone that was here.  I feel more connected to my food chain, and happy to have some home grown chicken headed to my freezer tomorrow.  Happy Homesteading!  ♫


Friday, August 24, 2012

I'm soooo Sorry!

Ok I feel bad, I just have not had the time to put up a new post.  I've been canning like mad.  I hope tomorrow all of my efforts will pay off, I'm loading up and heading out to the farmers market.  I will give you a taste of whats in store.  I will have posts on caning peaches, tomatoes, apples, and if I can get freebies pears. 
The best and most exciting news is that I was asked to be a partner in a local business.  I will be starting a sister blog, and pintrest account.  Happy Weekend!

Sunday, August 5, 2012

Million Dollar Garden Pasta Salad

Thanks to The Pasta Shoppe I was able to get some Thank a Million pasta.  If you have not had a chance to try their pasta I suggest you order some now.  It is the most amazing pasta I have ever had.  I thought I would pass along this recipe I used with one of their amazing pastas.

Million Dollar Garden Pasta Salad

1 lb Thanks a Million Pasta
1/4 cup peas
1/2 cup chopped tomatoes
1/2 lb Colby Jack cubed
1/4 cup onions chopped
1/4 cup green onion tops
1/2 cup shredded Parmesan cheese
1/2 cup Italian Dressing
Fresh basil(optional)


Cook Pasta and peas per directions on package. While pasta is cooking chop and cube ingredients except Italian Dressing. Add veggies, cheese and dressing to a bowl. Drain and rinse pasta and peas. Add Pasta and peas to the veggie mix and stir. Garnish with fresh basil (optional).

*More dressing can be added for a moister salad. Meat can be added to make a meal out of this dish instead of using it as a side dish. My favorites are pieces of Smoked Sausage, or Shredded Chicken

Enjoy!


Making the Most of Your Harvest: Onions

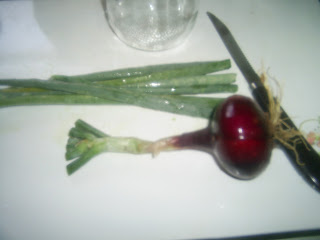
I always plant extra onions, as I thin I use the little onions like green onions.  As I thin later in the season I get to use the bulb as a regular onions, but the greens still taste like a green onion, just bigger.  Here is how I have been harvesting my onions.

First I separate the onion from the greens.

Next I use a clean pair of scissors to cut the greens into 1/8 to 1/4 inch pieces


I like to use the onion fresh, but I also like to freeze some for a cold winter day.  Here is a baggie of green onions for the freezer.

Next post will have what I made with the onions.  Be on the look out!


Making the Most of Your Harvest

I have a huge problem, I hate wasting anything. I do mean anything, cleaning out the fridge is the worst task for me. I complain the entire time, and I get mad that we are throwing out what was good food.  I have been wanting to do a series about making the most of your harvest, and now is the time to do it.  I live in beautiful Colorado, my garden is just now starting to produce anything since I can't start planting in tell June.  I hope you follow along as I make the most of what comes from my garden, and what freebies I get.  I will be posting a lot of canning recipes.  Break our your canner and follow along as I show you how I make the most of what is in my garden.

Wednesday, July 25, 2012

Why I love canning!

‎1. I have a very limited budget, but I have jars and the produce, so its way cheaper
2. I believe in having at least a year supply but being newly married, this is one way I can do it with little cost
3. I don't like that the Govt gets to regulate whats in my food, that's my job
4. I always make sure to can extras to give as gifts, everyone here loves getting jam and pickles for Christmas
5. Any extras after that can be taken to the farmers market to sell, and make me money for more canning supplies.

I'm still working on this list.  What are your favorite reasons to can or store food?

Friday, July 20, 2012

Following Directions

"Follow the Prophet, Follow the Prophet, Follow the Prophet, don't go astray.  Follow the Prophet, Follow the Prophet, Follow the Prophet he knows the way."  The children at church sing this song and even as an adult I remember part of the words.  What does this have to do with canning?  Well those simple lines have taught me so much in life.  Mom made jam the other day, while I was gone.  The apricots were pre-cut, the sugar measured correctly, everything was in place.  The problem you ask?  She didn't add everything in the RIGHT order.  The sugar went in before the pectin, the pectin was almost forgotten.  Three days later and instead of jam we have apricot syrup.  I'm sure it will set up, just not anytime soon.  Like life some rules and be bent, and broken.  Ice Cream for breakfast sure!  Jam has some definite rules and ones that I break and bend all the time.
Rules never to break in Jams and Jellies
1) All ways add the right things at the right times.  Sugar goes in after the fruit comes to a rolling boil.
2) Never add more sugar then the recipe states. 
3)Never add less sugar then the recipe states.
4) If the recipe asks for 1/4 cup Lemon Juice add it.  Sometime I do skip the lemon juice if it only asks for 1 tablespoon and I don't have any around.
5) Put in the correct amount of fruit, the way it asks for it to be prepared.  I sometimes puree a little more then I need and add it, but never more then say 1/4 cup.

Rules to break to make Jams and Jellies fun!
1) Just because a recipe says 5 cups apricots doesn't mean you can't substitute some of the fruit.  Often times I make my own Jam recipe off of the instructions given with the pectin.  In fact I'll give you a recipe for Apricot Pineapple Jam in a minute.  Never replace more then 2/5ths of the recipe. 
2) Adding spices is fun.  Cinnamon, sure.  Nutmeg, why not.  Cheyenne Pepper, well I would be careful, but what the heck!  Spice up your Jam.  Jelly is supposed to be clear, if making it for just you why not?  If you happen to be making jelly for the fair, keep it clear.

I hope this helps you in your quest for delicious homemade goods.  As promised a recipe

Apricot Pineapple Jam~ Courtesy of Aunt Linda
4 cups mashed Apricots
1 cup Pineapple
1 Box of Pectin
Sugar, Butter, and Lemon Juice asked for in the Pectin instructions

Add fruit, pectin, butter, and lemon juice in to a stock pot.  Bring to a rolling boil and add sugar.
Bring back to a rolling boil and boil typically for 1 minute. Ladle into sterilized canning jars and process for 10 minutes, adding time for altitude.  I had to process mine for 25 (I'm at 6,100+ feet).  Fetch jars our of the water bath canner and let sit for 24 hours. 

Letting the jars sit for 24 hours has nothing to do with the jam its self, but the lids.  Go ahead go get a lid, I'll wait.  If you have the nice shinny side up flip it over.  There should be the white bottom and a rubber ring.  Letting the jars sit for 24 hours insures that the rubber ring, that was warm and sticky while your boiled it in the canner, sticks its self to the jar. 


Song taken form the LDS Children's Songbook.

Tuesday, July 17, 2012

Free Apricots!

Today Mom and I picked Apricots for an hour, and I liked it!  I felt at home in the trees picking fruit, like I had been doing it my whole life.  The best part is the apricots were free, the key to getting free fruit is networking in your community.  It is one of those instances of its not what you know, but who you know.  The best part was seeing the hubby climb the latter and stand of the roof to pick apricots.  There is nothing better then working on a project together to strengthen your bond.  OK back to apricots.  After we got home I had no clue what to do with these little balls.  Dad will eat them, but not 40+ pounds of them.  I had to call a friend and admit I'm a bad homesteader.  I will share what I learned: You don't need to peel apricots!  I was wondering how was I going to peel them all.  Glad I won't have to.  To dry them I simply washed them and cut them in half.  I will be making them into jam, and will share the recipe I find later this week.  I'm counting this as part of our food storage, looks like I have at least another day worth of food. 


Thursday, July 12, 2012

Little Extras

Wow I can't believe that July is almost half over!  I have been so busy that I haven't had time to write a blog post.  I wanted to put my two cents in about giveaways.  I happen to be a giveaway nerd.  I'm try to enter one giveaway per day, more if I can find them.  I have won several giveaways, including hatching eggs, chicken feed, and gift cards.  I have set some rules for my self. 
1) I have to be able to use the item.  If I can't or won't use it I don't enter the giveaway.  I would like someone that will use it win it.
2) I try to enter giveaways for items that I can't or won't buy myself. 
3) I never cry over a lost giveaway.  I'm in it for the free stuff yes, but its also fun.  There is no reason to get upset over a lost giveaway, unless the rules are changed, or something unfair happens. 

Other then that have fun.  Facebook is a great place to find giveaways, as are blogs.  I would announce my first giveaway. but currently I don't have any sponsors.  I could giveaway a recipe!  If you are interested in my Strawberry Banana Jam recipe leave a comment.  If there is enough interest I'll host my first giveaway.


Solar Oven Giveaway!

American Preppers Network Giveaway

Friday, June 22, 2012

Food Storage


This morning while in the garden I picked lunch.  A handful of lettuce, some spinach, and the first peas.  I happened to turn my thought to canning and how much food I would be putting away for the winter.  The question is: How much is enough?  I happen to live on top of a mesa the only ways up and down are roads that could be closed in the winter.  How would I feed my family and my animals if I couldn't go to the store.  I went to Emergency Essentials and found a food storage calculator.  Here are the pros and cons of the calculator.
Pros:
  1. I can add items in the pantry that I get from the store or can my self.  Such as applesauce.
  2. As I was adding items I already had I could add items I needed.  My next order is stored on the website and I can order at any time. 
  3. On the right hand side of the page was a wonderful tool.  I could find products biased on nutritional needs.  Need more fiber no sweat the tool will help you find products with fiber.
  4. After I had all of my food on hand in the calculator I found out how many days of food I had on hand.  I currently have 30 days of food.  It even shows what nutritional value your food on hand has. 
Cons:
  1. There is no place for to add animals.  My food storage is biased on 3 people not 3 people, 1 dog, and 40 chickens.  I know I don't have enough food for the animals.  I also know that I could feed the animals off of stored food such as wheat, dried fruits, and so much of what they sell.
  2. I can't add animals for food storage.  In the summer my girls lay plenty of eggs.  The eggs and any extra roosters are part of my food storage and could be eaten.  There is just no place to put that in the calculator.
  3. I was trying to figure out food storage for a few winter months, but if I was trying to figure out enough food storage for a year I would like to add my garden.  I have blueberries, blackberries, and cherry bushes.  No place to add that to a years supply, not to mention the garden which produces so much in late summer.
Over all I did like the food storage calculator from Emergency Essentials.  I was excited to know as of right now we can survive 30 days should I not be able to go to the store.  I hope that all of you will consider having some type of food storage.  Here is a direct link to the calculator. 


<a href="http://preparednesspantry.blogspot.com/2009/10/food-storage-analyzer-gift-card.html" target="_blank"><img alt="Gift Card Giveaway" src="http://beprepared.com/images/art/giftcardbanner40.png"/></a></center>

Wednesday, June 20, 2012

Chicken Sweater

Today was hot, yesterday was hot, tomorrow is supposed to be hot.  With all this heat and no end in sight, I've found that I need a nice cool afternoon project.  I've taken to crocheting.  Not the big winter blanket crocheting, but little 1 day projects.  Chicken sweaters have taken over my afternoons.  I will admit I love it.  I have been using up some random balls of yarn, and it has been fun using up the different colors.  Caution:  Do NOT use red chickens are attracted to the color red and will pick at it.  Here is the pattern I found: http://barnyardsandbackyards.org/2011/02/03/chicken-sweaters .

What a good sport Katniss was to pose in a sweater for us. 

Wednesday, June 13, 2012

Upcycled Chicken Coop

I'm very excited!  The Little Upcycled Coop was finished today.  The only thing we bought is 3 boxes of screws costing around $21.  Everything else was reused, and well FREE.  That in its self is exciting.  I will warn you now.  It will not win the cutest coop of the year award, but it might just win the cheapest coop of the year award.  Check out the other blog posts on our little coop if you would like to see the beginning steps involved in building this coop.


Today's first step was setting up the walls.

I was on babysitting duty since my husband needed help.  They used screws to tie the pallets together on the long sides.

Next they installed the window that will serve as my door.  Sorry I couldn't get a picture.  Then they ran 2x4x10's along the top, and screwed the tin roofing to the 2x4's.  Here is a picture of the finished coop.


One cute Little Upcycled Coop.  The chicks aren't living there yet, I still have to put fencing up.  I hope this project gave you some ideas on making you own upcycled coop.

The Small Tale of the Moody Broody

Moody Broody after I counted her eggs today.
Meet my Moody Broody.  Saturday June 9th my little hen decided she was going to be a mama.  I wasn't sure she was in it for the long haul so I took most of her eggs away and left her with only 4.  The next morning she was still sitting, so I added 10 more for a grand total of 14.  I marked all of her eggs with a colored pencil to keep track of witch eggs were hers.  The other hens decided that they would take over her nest.  It doesn't seem to bother her, but it did make me mad.  I just knew that one of her eggs would be broken.  Of course on Monday one of her eggs was broken, and I was broken hearted.  One of Moody Broodie's babies was killed.  I tried to move her nest, I took both her and her eggs and placed them in the dog house with straw.  She was not impressed and would not set.  I moved the dog house into her old run so she could be with her pen mates, well that didn't work.  I had no choice but to put her back in one of the nesting boxes.  I had to do something.  Then it occurred to me, I've seen nesting box curtains made by The Chicken Chick .  They didn't need to be fancy or fabric, just functional.  I needed to keep her out of site so the other hen's wouldn't lay their eggs with her.  Tuesday (yesterday) I figured it out, a feed bag would solve my problem.  I cut the back off of a feed bag cut it in half, and stapled it to the nesting box Moody Broody was using.  Drum Roll please.......... this afternoon when I went to count Moody Broodie's eggs there were only 13!  No extra eggs.  This is such a simple fix.  I hope you had fun with my story.  I'll keep you updated on Moody Broodie's hatch.  They are due July 1st!  Just in time to help us celebrate Independence Day. 

Here is the nesting box curtain.  Moody Broody is behind it happily setting on her eggs.

Saturday, June 9, 2012

Phone book Firelog

Around here we have 4 different phone books, two for our area, and two for the neighboring big city.  Every year we get new phone books and this year we even received repeats.  I hate throwing things away you should know that by now =)  So I found a way to reuse the phone books.  I personally don't have a fireplace, but I know plenty of people that do.  I rip off the covers and any glossy pages roll them up and tie them with string.  We've have burned a few phone books in our burn pile and they burn forever.  I'm sure these will to, put them on the bottom and keep adding the wood on top to keep you house toasty warm.  I know I'm talking about a toasty warm house in the middle of summer, but hay winter is right around the corner. 
Phone book Log pile.


*Although this is a way to reuse phonebooks, should you go ahead and use this idea, I take NO responsibility to those who use it.  When fire and life is involved please be careful, and use common since.

Tuesday, June 5, 2012

Planting Garlic

Its a little late to post this for this years garden but, it is never to late to start thinking of next year.  I stumbled upon this when I was in college. I needed a little garlic and proceeded to take the skin off of the entire bulb.  I put the rest in the fridge.  The rest gave me the knowledge to help you plant some garlic really cheap. 

First you will need some garlic, either from your garden or from the store.

Start separating the cloves from the bulb.  I save the biggest cloves for planting and use the small ones for cooking.
Separated and ready for the skin to come off.


Skin is off and ready to plant.

Next you have some options, if you plant in the fall which is traditional you simply plant the garlic in the ground about 2 inches deep.  If you are going to plant in the spring you can either plant the garlic in March right after you have separated the skin from the garlic.  Another way to do it is to separate the skin and the garlic in February and put it in a container in the fridge it will start to sprout, plant in March.

I find this the ultimate upcycle.  After just one purchace you have a lifetime supply of garlic, just by keeping the biggest cloves to make more bulbs.  Happy Planting!

Saturday, May 19, 2012

Canning Time!

I love summer!  I love the warm air, the long days, and of course the fresh fruit.  Oh how I love the fresh fruit.  We are in the middle of adding berry bushes to our landscape, and so far had planted our 3 Blackberry Bushes and 3 Cherry Bushes.  We are expecting more so I thought I would brush up on my canning skills.  Today I will be canning Strawberry Jam, Strawberry Watermelon Jam, Strawberry Banana Jam, and Strawberry Syrup.  Can you guess what was on sale this week?  Strawberries!  I will not give up my recipies, althought the Strawberry Syrup is from pintrest, because they are unique.  I do hope that you will dust off you water bath canner and get canning!

Monday, May 14, 2012

Second Coop-How to

I thought I would share what we are doing to the coop so far. My husband has borrowed a saw and is taking the pallets apart and putting them back together so that they are solid wood on the front. They will then be used like plywood to make the coop this part of the work is taking several days. With the temperature in the 80's we won't work in the heat of the day.
What a Cute Little Helper.
Don't worry Daddy is standing just out of camera range, and he doesn't have power or a bit.  I take good care of my little helper.  You can see how we are putting together the pallets tho.

Friday, May 11, 2012

Day 2

Day 2 of coop building and nothing is really going to get done.  Our nephew was dropped of yesterday, and he does not like power tools.  We have picked up some more screws which makes my husband happy and a old window that will serve as our door.  Building will be put on hold in tell next week.  Have a great weekend!

Thursday, May 10, 2012

Our Second Coop

Sorry there is no pretty picture, but I wanted to share that we have officially started on our second chicken coop today.  Our first one was built by my dad and some friends of the family.  We have had it for the last nine or so years and it currently houses our Blue/Green flock.  I've felt like I should add a few more hens but wanted to add Brown layers.  If you mix your blue layers with brown layers you get Olive Eggers.  Although the eggs are beautiful, and I've got some Olive Eggers in the incubator I would like to have blue,green,brown,and pink eggs.  Anyway all of this means I need a second coop.  In the spirit of reusing what is around the community I've decided to use pallets.  Don't let me fool you, I also don't have the money to build one with all new materials.  As for today's work, we started taking off the front wood of the pallet, and using that to make a new front that is solid wood.  So far so good and we have 4 complete pallets done.  I'm looking forward to getting these little one's out of the house.

Saturday, May 5, 2012

Planting Pots

As promised here is my upcycled planting pots.

You will need:
Milk Jugs or 2 liter Soda Bottles
Box Cutter
Magic Marker

First empty your container and wash with hot water.  I never bother with soap.
Second pick how you want to cut your container with milk jugs you have 2 options.
I don't usually draw where I'm going to cut but so you can see your options I did on these two milk jugs. 

Start cutting!

Here they are cut and ready for you to fill with dirt.


Fill with dirt, add seeds, and then label if you so choose.  I like to add handles to make carrying easier, but I don't know if I'll be able to get the plants out as easy.

Greenhouse Van

The story begins, with a broken van that we can't afford to fix at this point.  So I figured that if it was going to sit in the yard that it needed to have a purpose.  I thought it over and since I couldn't buy a greenhouse I would get the best of both worlds.  This is a easy project and requires very little. 

You'll need:
1 broken vehicle
Left over wood or wood flooring
Plants

First fold down the seats, and take off the headrests if they won't fit. 

Next get the board or flooring and cover the gaps.

Here it is started.

Flooring is done.

Next add the plants


After getting my plants in I see I still have some room.  So I'm off  to start some more Zucchini!  I'll post a simple how to on making your own planters, upcycled of course.

Wednesday, May 2, 2012

Welcome

Hello!  Welcome to Upcycled Farm's Blog page.  After seeing some amazing blogs, and not seeing what I had to offer I decided to start my own blog!  I will try to help you recycle some odds and ends into amazing farm equipment, crafts and just useful items.  I believe in seasonal crafts, farming, and baking so I hope you enjoy the four seasons with me as we explore the amazing things we can create together.